Table of Contents
The Woes of a Broken Necklace Chain
Necklaces are a beloved accessory that can elevate any outfit, but there’s nothing quite as irritating as discovering that the chain has broken. A snapped chain is not only unsightly, but it also endangers the precious pendant or beads it carries. That’s why you need to learn how to fix a broken necklace chain!
We’ve all been there, delicately holding the fragile pieces together with a safety pin or duct tape hoping to keep it in place just for one more wear. It’s time to put away those makeshift solutions and learn how to fix your broken necklace chain properly.
Why Fixing It Is Important
A broken necklace chain can cause more damage than we realize. The weight of the pendant or beads can cause portions of the chain to rub against skin and clothing, causing further breakage and even scratches on precious surfaces.
Furthermore, attempting to wear it with a broken chain link puts undue stress on other parts of the necklace which may lead to additional breakages. Investing time into fixing your necklaces will save you money and frustration in the long run by keeping your jewelry collection intact for years to come.
– Long Nails, No Problem: Mastering the Art of Effortlessly Putting On Necklaces
– Layering Necklaces for a Fashionable Look
– How to Choose the Right Necklace for Different Necklines
Gather Materials: What You Need to Fix a Broken Necklace Chain
When it comes to repairing your broken necklace chain, the first step is to gather all the necessary materials. Here’s what you’ll need:
The Necessary Tools
The most important tool you need is a good pair of pliers. You’ll use these to manipulate the jump rings that will connect the chain links.

Essential Jewelry Pliers Set – 4 Pack Tools for Craft Making & Wire Wrapping
This 4-pack includes Needle Nose Pliers, Round Nose Pliers, Wire Cutters, and Bent Nose Pliers.
Crafted from sturdy steel, these tools are perfect for wire cutting, shaping, crimping, and more. They are ideal for jewelry making, repair, wire wrapping, and various crafting projects.
The versatile Chain Nose Pliers allow access to tight spots, while the Round Nose Pliers help create loops and eye pins.
Make sure they are small and thin enough to work with delicate pieces of jewelry. You’ll also need jump rings, which are small metal rings that open and close like a miniature keychain ring.
These come in different sizes and thicknesses, so it’s best to have an assortment on hand. You will need a small clasp.
These can be found at any craft store or online retailer that sells jewelry-making supplies. Choose one that matches the style of your necklace chain.
Check for Spare Parts in Old Jewelry Boxes or Purchase Them from A Craft Store
Before heading out to buy new parts, check your old jewelry boxes for spare parts. You may find extra jump rings or clasps that match perfectly with your broken necklace chain.
If you don’t have any spare parts lying around, head to your local craft store or browse online retailers for supplies. Many stores sell pre-made kits specifically designed for repairing jewelry, which can be helpful if you’re not familiar with the process.
Check out our Amazon Affiliate link for available Jewelry Supplies.
Cridoz 2340Pcs Jump Rings and Clasps Jewelry Making Kit
This kit includes 120 lobster clasps, 900 4mm open jump rings, 720 6mm open jump rings, 600 8mm open jump rings, a jump ring opener, and curved tweezers.
With a variety of colors (gold, silver, bronze, red copper, metal grey, rose gold), it’s perfect for bracelets, necklaces, earrings, and more.
Made of durable iron alloy, these jewelry findings come in a convenient container box for easy organization.

By gathering all of these materials before starting your fix job, you’ll save yourself time and energy during the repair process. Plus, having everything on hand will help ensure that you don’t miss any important steps along the way!
– Necklace Matchmaker: A Guide to Pairing Necklaces with Outfits and Occasions
– 5 Trendy Necklace Styles to Elevate Your Spring Look
– Choosing Necklace Lengths That Flatter Your Body Type and Style
Assess the Damage
Before diving into the repair process, it is essential to assess the damage done to your necklace. Start by carefully examining both ends of the chain to identify where it broke. If you’re unable to locate the breakage, try gently pulling on different parts of the chain until you notice a gap or opening.
Once you have identified where the chain has broken, assess how severe it is. If the break is clean and has not caused any further damage to other parts of the necklace, then fixing it should be a relatively straightforward process.
Examine Other Parts of the Necklace For Potential Damage or Weak Spots
In addition to assessing where your necklace has broken, take some time to examine other parts of your jewelry piece for potential damage or weak spots.
Look for kinks, tangles, or twists in other areas of your necklace that may cause stress on other parts.
Run your fingers through each link and make sure they are all connected properly without any gaps or openings.
Pay close attention to any links near where it broke as they may have been weakened from previous wear and tear. If you find any areas that need repairing beyond just fixing the broken chain link, tackle those first before addressing the main issue.
This will ensure a more long-term fix for your precious piece of jewelry. Taking a few extra minutes now can save you from further headaches down the road and keep your necklace in tip-top shape!
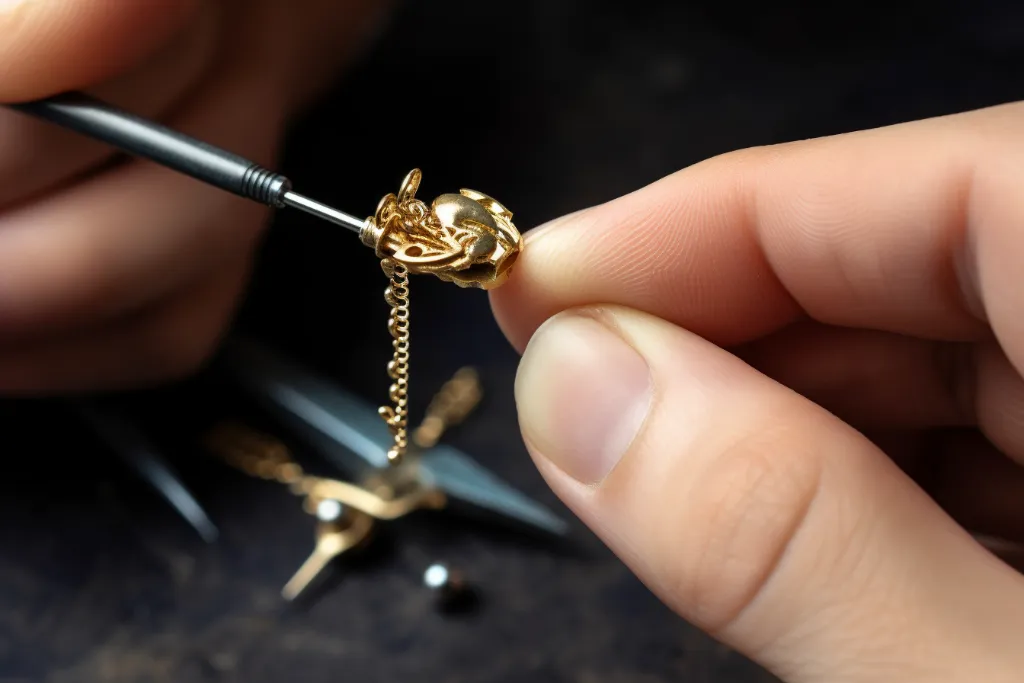
Reconnect Chain Links
How to Use Pliers to Open and Close Jump Rings
First, locate the broken chain link. Using the pliers, gently grip one end of the jump ring and twist it open by moving one end away from your body while keeping the other end stationary.
Be careful not to twist too hard, or you may damage the jump ring. Repeat this process with the new jump ring that you will attach to both ends of the broken chain link.
How to Attach New Jump Rings to Both Ends of the Broken Chain Link
After opening both jump rings, take one end of the broken chain link and slide it through one of them until it reaches halfway through. Next, carefully slide another section of the chain through this same opened jump ring until it touches and links with the first section. Then, using your pliers again, twist this same jump ring closed by moving each end towards the other until they meet.
Repeat these steps on both ends of the broken link with a new set of jump rings so that they connect together properly. Remember that proper alignment is important when attaching two sections of a necklace chain together using a jump ring in between them because if it’s not done correctly, your necklace could be uneven or look awkward when wearing it.
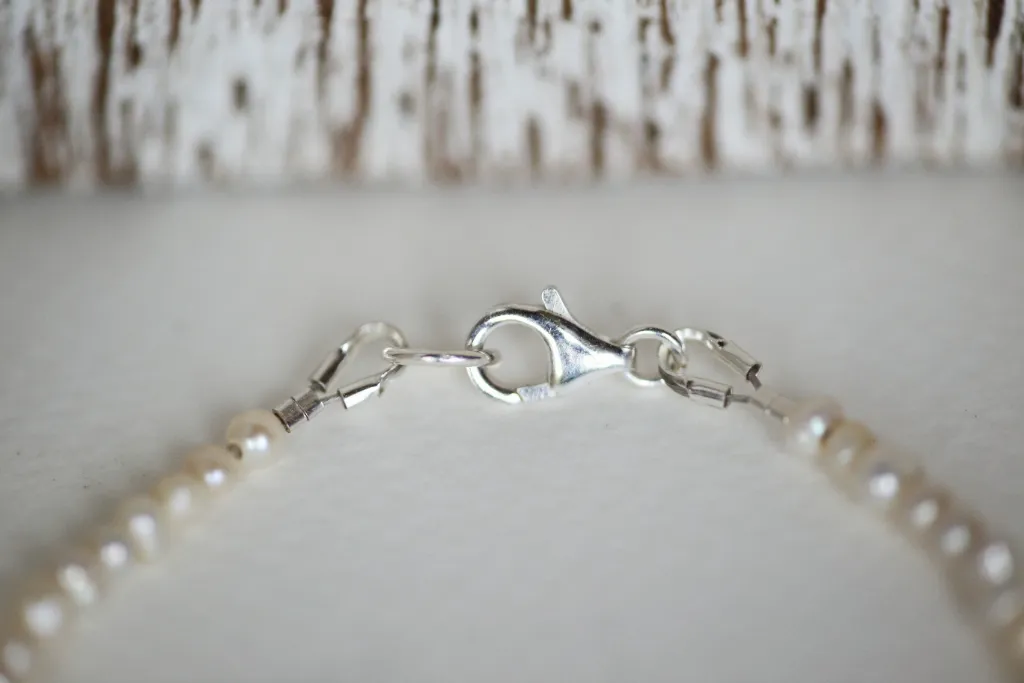
Add Clasp to Broken Necklace
Choosing a Clasp
When it comes to choosing a clasp for your necklace, there are many options available. Some popular choices include lobster clasps, spring ring clasps, and toggle clasps. Each type of clasp has its own benefits and drawbacks, so it’s important to consider both the functionality and aesthetics of your chosen clasp.
Lobster clasps are a common choice because they are easy to use and secure. They have a small lever that releases the clasp when you want to take off the necklace.
Spring ring clasps work in a similar way but can be more difficult to operate with one hand. Toggle clasps are also popular because they add a unique touch to your necklace’s design.
Adding the Clasp
To add the clasp onto one end of the chain, you’ll need another jump ring. Place the jump ring through the loop on one end of the chain, then attach the clasp to that same jump ring before closing it securely with pliers. Make sure that you choose a jump ring that is strong enough to hold both ends of your chain together as well as support any weight added by your chosen clasp.
If you’re unsure about how much weight your chosen jump rings can support or how large they should be, consult online jewelry-making resources or speak with an expert at your local craft store for guidance. Adding a small clasp is an easy and effective way to enhance both fashion and function in repairing broken necklace chains!
Test Necklace
Is It Secure?
Once you’ve connected the broken chain links and added a clasp, it’s time to test the necklace. Gently tug on different parts of the necklace to ensure each connection is secure.
Make sure there is no slack in the chain or other weak spots that could easily break again. If there are any issues, go back and double-check your work.
Wearing It Around
After testing the necklace, it’s important to wear it around for a few hours before wearing it out in public. This ensures that everything stays securely connected while you’re moving around and going about your daily activities.
During this test period, be mindful of any discomfort or irritation caused by the necklace. Sometimes fixing a broken chain can affect how it sits on your neck or chest.
Overall, fixing a broken necklace chain isn’t as daunting as it may seem at first. With a few simple tools and some patience, anyone can fix their own jewelry and avoid costly repairs or replacements.
Always take care when handling delicate parts like chains and jump rings to avoid further damage or injury. Happy repairing!
Conclusion
Fixing a broken necklace chain may seem daunting at first, but with the right tools and a little patience, it can be quite easy. Remember to gather all necessary materials and assess the damage before attempting any repairs. Reconnecting chain links and adding a small clasp are simple steps that can make all the difference in keeping your necklace secure and intact.
By fixing your broken necklace chain, not only will you save money on costly repairs or replacements, but you’ll also be able to continue enjoying and wearing your favorite jewelry pieces for years to come. So don’t give up on that treasured necklace just because it’s broken – try fixing it yourself!
And who knows – maybe this newfound skill will inspire you to tackle other DIY projects or even start making your own jewelry from scratch. The possibilities are endless when you have the confidence to take matters into your own hands.